Table of Contents
Introduction
If you’re a fan of bold, briny flavors, dilly beans for Bloody Marys are a must-try. These pickled green beans are crisp, tangy, and bursting with fresh dill and garlic. They’re the perfect garnish to elevate any Bloody Mary cocktail—and they make a snappy snack on their own, too.
This easy recipe shows you how to make homemade dilly beans using simple ingredients and a no-fuss refrigerator pickling method. No canning gear needed!
Whether you’re prepping for weekend brunch or building the ultimate Bloody Mary bar, these crunchy, flavor-packed beans will steal the show. Plus, they last for weeks in the fridge—so you can enjoy them anytime.
What Are Dilly Beans?
A Pickled Green Bean with Big Personality
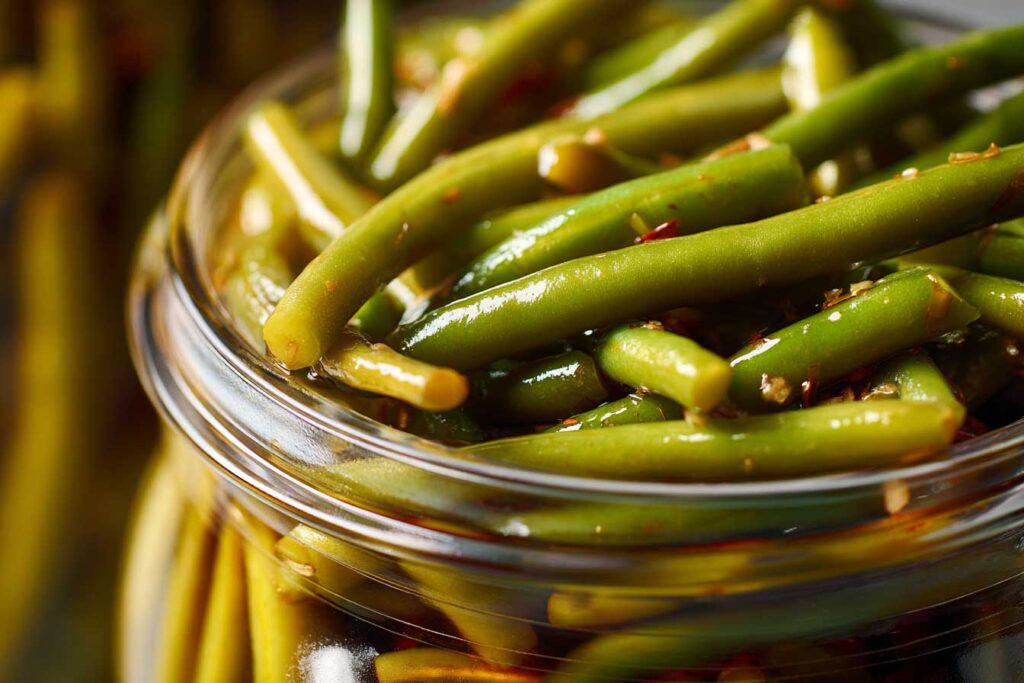
Dilly beans for Bloody Marys are a flavorful spin on classic dill pickles. Instead of cucumbers, you’ll use crisp, fresh green beans pickled in a brine of vinegar, garlic, and dill. The result? A crunchy, tangy treat that enhances any Bloody Mary garnish game.
How Dilly Beans for Bloody Marys Stand Out
Unlike ordinary pickled vegetables, these beans are made with bold seasonings that can hold their own in a cocktail. The long, sturdy shape makes them easy to spear and dunk into a Bloody Mary. Plus, their snappy texture provides the perfect contrast to a rich tomato drink.
A Must-Have Garnish for Brunch
People love serving dilly beans for Bloody Marys during weekend brunches or special gatherings. They’re not just tasty—they’re eye-catching too. Whether you serve them on a skewer or pop them right into the glass, they add flair and bold flavor that impresses every time.
Easy, Quick Pickling at Home
The best part? You don’t need canning equipment. This recipe uses a quick refrigerator method, meaning your beans will be ready to enjoy in just a few days. It’s beginner-friendly and doesn’t require sterilizing jars or long processing times.
Ingredients You’ll Need
Fresh, Crunchy Green Beans
Start with 1 pound of fresh green beans—trimmed and washed. Look for firm, bright beans with no soft spots. These are the heart of your dilly beans for Bloody Marys and need to hold their crunch.
Aromatics and Herbs
- 4 cloves garlic, smashed – for bold, savory flavor
- 1 bunch of fresh dill – the star herb in any dilly beans recipe
- 1 teaspoon red pepper flakes (optional) – adds a touch of heat that pairs beautifully with spicy Bloody Marys
Tangy Pickling Brine
This simple brine infuses flavor and preserves the beans:
- 1 cup white vinegar
- 1 cup water
- 1 tablespoon kosher salt
Bring it to a boil before pouring it over your beans in jars.
Optional Garnish Add-Ins
Want to customize your dilly beans for Bloody Marys? Try these:
- A few slices of fresh jalapeño for extra spice
- 1 teaspoon mustard seeds or black peppercorns for deeper flavor
- A lemon peel strip to add brightness
Mason Jars or Glass Containers
Use 2 pint-size mason jars or any heat-safe glass containers with tight lids. Make sure they’re clean before filling. You don’t need to fully sterilize for this refrigerator-style recipe, but cleanliness is key.
How to Make Dilly Beans (Step-by-Step)
Step 1 – Prepare the Green Beans
Wash and trim 1 pound of green beans, snapping off the stem ends. Keep them whole if they fit your jars. If not, cut them in half. For the best dilly beans for Bloody Marys, choose beans that are uniform in size so they pickle evenly.
Step 2 – Pack the Jars
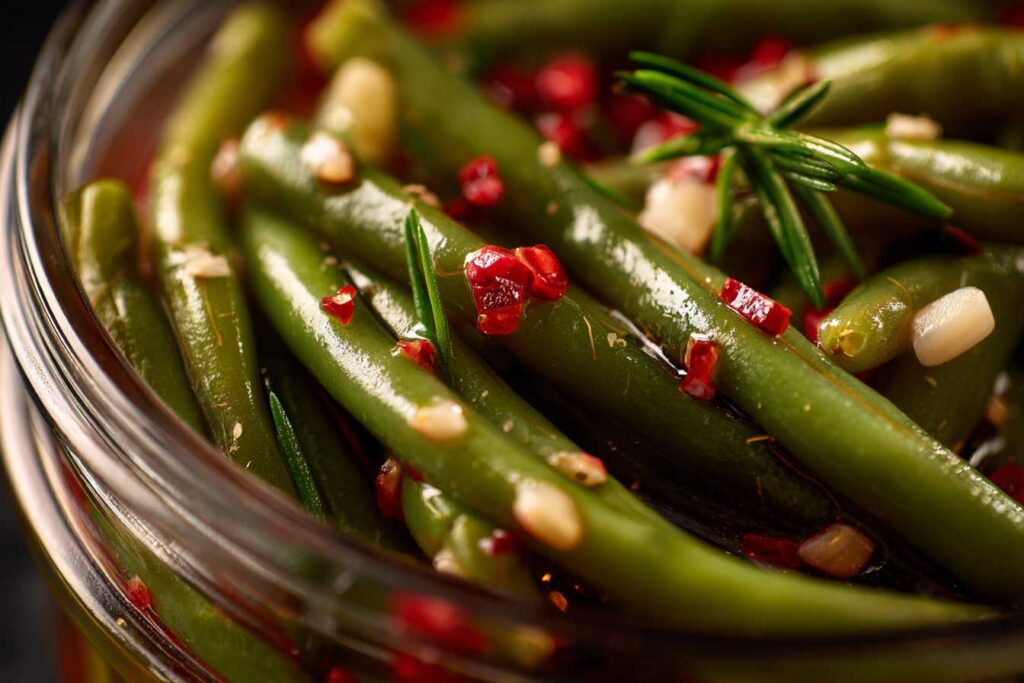
Place a few sprigs of fresh dill and 1–2 smashed garlic cloves at the bottom of each clean pint-size jar. Next, add a pinch of red pepper flakes if desired. Stand the green beans upright in the jars, packing them tightly but not crushing them. If using jalapeño slices or peppercorns, add them now.
Step 3 – Make the Brine
In a small saucepan, combine:
- 1 cup white vinegar
- 1 cup water
- 1 tablespoon kosher salt
Bring the mixture to a gentle boil, stirring until the salt dissolves completely. Remove from heat.
Step 4 – Pour Brine Over the Beans
Carefully pour the hot brine over the green beans, making sure they’re completely covered. Leave about ½ inch of headspace at the top of each jar. Use a spoon or small spatula to release any trapped air bubbles.
Step 5 – Seal and Chill
Screw on the jar lids tightly and let them cool at room temperature for 30 minutes. Then, place the jars in the refrigerator. The dilly beans for Bloody Marys will develop full flavor after 24–48 hours and keep well for up to 3 weeks in the fridge.
Tips for the Best Pickled Green Beans
Use the Freshest Beans Possible
The secret to crisp dilly beans for Bloody Marys starts with ultra-fresh green beans. Avoid limp or spotted beans—fresh ones snap when bent and hold their texture better after pickling.
Pack Beans Vertically and Tight
Stand the green beans upright in the jar for a beautiful presentation. Pack them tightly but without bending or snapping. This helps maximize jar space and keeps the beans submerged in brine.
Let Them Rest for Maximum Flavor
Resist the urge to dig in right away! Let your dilly beans for Bloody Marys sit in the fridge for at least 24 hours. For the best flavor and tangy punch, wait 2–3 days before using them as a garnish.
Don’t Skip the Garlic and Dill
Fresh garlic and dill are essential for that signature “dilly” taste. Dried herbs don’t deliver the same punch—always use fresh for best results.
Add a Little Heat (If You Like It Spicy)
Want your dilly beans for Bloody Marys to bring the heat? Add sliced jalapeños or increase the red pepper flakes. Just remember, a little goes a long way after a few days in brine.
How to Serve Dilly Beans in Bloody Marys
Use Them as a Cocktail Garnish
The easiest way to enjoy dilly beans for Bloody Marys is to simply place 1–2 beans straight into your cocktail glass. Their tangy, crisp flavor cuts through the richness of the tomato juice and adds a delightful crunch.
Build a Garnish Skewer
Want to impress at brunch? Skewer your dilly beans alongside olives, pickles, cherry tomatoes, or even a cube of cheese or crispy bacon. It creates a picture-perfect garnish that looks as good as it tastes.
Pair with Spicy Bloody Mary Mix
These beans shine when paired with a spicy Bloody Mary mix. Their dill and garlic flavors complement heat beautifully, making every sip pop with flavor.
Add Them to Brunch Boards
For a creative presentation, lay your dilly beans for Bloody Marys on a charcuterie or brunch board. They pair perfectly with cured meats, cheese, crackers, and other pickled veggies.
Snack on the Side
Not in the mood for cocktails? These beans double as a crunchy, salty snack straight from the jar. Their zesty flavor also makes them a great side dish for sandwiches or sliders.
Storage & Shelf Life

Refrigerator Storage Made Simple
Since this is a quick-pickled recipe, you’ll store your dilly beans for Bloody Marys in the refrigerator. Make sure the jars are tightly sealed and that the beans remain submerged in brine to preserve their flavor and crunch.
How Long Do Dilly Beans Last?
Refrigerated dilly beans will stay crisp and tasty for up to 3 weeks. While they’re technically safe to eat longer, their texture and flavor start to decline after that point.
When Are They Ready to Eat?
Give the beans at least 24 hours in the fridge to absorb flavor. For best results, wait 2–3 days before using them in Bloody Marys. The longer they sit (within reason), the more intense the flavor.
Signs They’ve Gone Bad
If you notice:
- Cloudy or slimy brine
- Mold on the surface
- A foul or off smell
…discard the beans immediately. Properly stored dilly beans for Bloody Marys should stay fresh, crisp, and vibrant.
Variations to Try
Spicy Dilly Beans
Love heat in your Bloody Mary? Turn up the spice by adding sliced jalapeños, serranos, or extra red pepper flakes to your jars. These spicy dilly beans for Bloody Marys bring serious zing and pair perfectly with bold, peppery cocktail mixes.
Garlic-Lovers Version
If you’re a garlic fan, double the amount in your recipe. You can even add a smashed clove on top before sealing the jar. Over time, the brine absorbs the garlic’s bold flavor, making the dilly beans even more savory.
Lemon-Dill Beans
Add a strip of lemon zest to each jar for a bright citrus note that balances the vinegar. These lemon-infused dilly beans for Bloody Marys offer a slightly lighter, refreshing twist—perfect for summer brunches.
Mustard Seed Crunch
For a subtle earthy flavor and a little extra pop, toss in a teaspoon of mustard seeds with your brine. It adds a depth that pairs beautifully with both classic and spicy Bloody Mary mixes.
Pickled Veggie Blend
Want variety in every bite? Add carrot sticks, asparagus tips, or even okra to your jars alongside the green beans. This creates a flavorful medley of pickled garnishes ideal for your next Bloody Mary bar.
FAQs About Dilly Beans
How soon can I eat dilly beans for Bloody Marys?
You can technically eat them after 24 hours, but for peak flavor, let your dilly beans for Bloody Marys sit for 2 to 3 days in the fridge. The flavors intensify and the texture improves.
Can I reuse the pickling brine?
It’s not recommended to reuse the brine for a fresh batch. After one use, the acidity drops and the flavor balance changes. Always make a fresh brine to ensure your next batch of dilly beans is safe and delicious.
Can I make these shelf-stable with canning?
Yes! If you’re familiar with proper water bath canning techniques, you can absolutely preserve dilly beans for Bloody Marys for long-term pantry storage. Just follow USDA canning guidelines for acidity and processing time.
Are dilly beans keto or low-carb?
Yes. These dilly beans are naturally low in carbs and sugar, making them a great keto-friendly option—especially since no sugar is added to the brine.
Can I use frozen green beans instead of fresh?
Fresh beans are best for texture. Frozen beans tend to get mushy in brine and won’t give you the crisp bite that makes dilly beans for Bloody Marys so satisfying.
Conclusion
Whether you’re building the ultimate brunch board or just want a bold, crunchy garnish for your cocktail, dilly beans for Bloody Marys are a must-have. With their tangy vinegar bite, fresh dill aroma, and satisfying snap, they elevate any Bloody Mary into something truly unforgettable.
Best of all, this quick-pickling method makes them easy to prepare at home—no canning required. With just a few simple ingredients and a couple of jars, you’ll have a fridge stocked with zesty, crave-worthy garnishes in just days.
So grab some green beans, mix up that brine, and let your next Bloody Mary shine. Cheers to homemade flavor that bites back—in the best way.


Dilly Beans for Bloody Marys – Crisp, Tangy & Perfectly Pickled Recipe
- Total Time: 20 minutes
- Yield: 2 pint jars 1x
Ingredients
- 1 pound fresh green beans, trimmed
- 4 garlic cloves, smashed
- 1 bunch fresh dill
- 1 teaspoon red pepper flakes (optional)
- 1 cup white vinegar
- 1 cup water
- 1 tablespoon kosher salt
- 1 teaspoon mustard seeds (optional)
- 2 pint-size mason jars, clean
- Optional: 2–4 slices jalapeño, lemon zest, or black peppercorns
Instructions
- Prep the Beans: Rinse and trim the green beans. Cut in half if needed to fit the jars.
- Pack the Jars: Add garlic, dill, and any optional flavorings to the bottom of each jar. Stand the green beans upright and pack them tightly.
- Make the Brine: In a small saucepan, bring vinegar, water, and salt to a boil. Stir until salt dissolves.
- Add Brine: Pour the hot brine over the beans in each jar, leaving ½ inch headspace. Tap gently to remove air bubbles.
- Seal & Chill: Seal jars, let cool 30 minutes, then refrigerate. Wait at least 24 hours before eating; best flavor after 2–3 days.
- Enjoy: Serve as a Bloody Mary garnish, snack, or brunch board addition.
Notes
- Fresh beans = crisper results
- Add more garlic or jalapeño for stronger flavor
- These are quick pickles (not shelf-stable unless properly canned)
Storage
- Store in the refrigerator for up to 3 weeks
- Keep beans fully submerged in brine for best shelf life
- Discard if brine becomes cloudy or beans feel slimy
- Prep Time: 15 minutes
- Cook Time: 5 minutes (for brine)
- Category: Pickles, Brunch
- Cuisine: American
Explore more delicious recipes in : Seasonal & Holiday Recipes
Follow us on Instagram for daily recipes & kitchen tips