
Table of Contents
Introduction
Have you ever wondered why some pickled vegetables, particularly dilly beans, maintain that satisfying crunch while others fall flat? What if I told you that the secret to extra crispy dilly beans lies in a few simple techniques? In this guide on making Extra Crisp Dilly Beans, not only will you learn how to achieve that perfect crunch, but you’ll also explore incredible flavor combinations to elevate your pickling game!
Ingredients List – Extra Crisp Dilly Beans
Get ready to dive into a world of tangy, flavorful dilly beans with this scrumptious ingredients list. Each component plays a vital role in creating that enticing crunch and delightful taste.
- 2 pounds fresh green beans, trimmed
- 1 cup distilled white vinegar
- 1 cup water
- 2 tablespoons kosher salt
- 4 cloves garlic, peeled
- 2 teaspoons dill seeds or 1 bunch fresh dill
- 1/2 teaspoon red pepper flakes (optional for spice)
- 1 teaspoon black peppercorns
- 1 tablespoon mustard seeds or coriander seeds (substitute according to taste)
- 1 tablespoon sugar or a sugar substitute for a less sweet profile

Timing
The preparation for Extra Crisp Dilly Beans takes approximately 30 minutes, while the pickling process will require another 15 minutes of active cooking time. In total, you can have these delightful beans ready in just 45 minutes, which is significantly less time than the average recipe that sits at 90 minutes or more. That means more time enjoying your delicious creations!
Step 1: Prepare the Beans
Start by washing and trimming the green beans. Aim for uniform lengths to ensure even pickling and a polished presentation! Consider using a sharp knife for quicker trimming.
Step 2: Make the Pickling Brine
In a medium saucepan, combine vinegar, water, kosher salt, and sugar. Bring this mixture to a gentle simmer over medium heat, stirring until the salt and sugar have completely dissolved. This sweet and tart brine is what makes your dilly beans irresistible!
Step 3: Pack the Jars
Sterilize glass jars while your brine is heating. Place garlic cloves, dill seeds, peppercorns, and red pepper flakes at the bottom of each jar, then pack your tender green beans vertically to maintain their crunch.
Step 4: Pour the Brine
Carefully pour the hot brine over the packed beans, leaving about half an inch of headspace at the top of each jar. This headspace is crucial for proper sealing and to avoid messes!
Step 5: Seal and Process
Wipe the rims of the jars with a clean cloth to ensure a tight seal before placing the lids on top. If you’re interested in long-term storage, consider processing your jars in a boiling water bath for around 10 minutes to create a sealed and shelf-stable product. Otherwise, they can be stored in the refrigerator for up to a month.

Nutritional Information – Extra Crisp Dilly Beans
These Extra Crisp Dilly Beans are not only delicious but also packed with nutritional benefits! Here’s a breakdown per serving.
- Calories: 30
- Protein: 1g
- Carbohydrates: 5g
- Dietary Fiber: 2g
- Sodium: 230mg
- Fat: 0g
- Sugars: 1g
Healthier Alternatives for the Recipe
Might you be keen to try something a bit different? Here are some healthier alternatives that keep the flavor but enhance the nutrition.
- Substitute white vinegar with apple cider vinegar for a hint of sweetness and additional nutrients.
- Use sea salt instead of kosher salt for a more mineral-rich option.
- Opt for less sugar or a natural sweetener like stevia to reduce calories.
- Incorporate other vegetables like carrots or cucumbers for added crunch and fiber.

Serving Suggestions
These Extra Crisp Dilly Beans are versatile and perfect for various occasions. Consider these creative serving ideas:
- Serve them as a crunchy side salad with your favorite dressing.
- Chop and mix them into potato salads for a tangy twist.
- Pair them with cheese boards, adding color and texture that stands out.
- Enjoy them as a zesty snack for a midday refreshment.
Common Mistakes to Avoid
- Overcooking the Beans: Cook them just until they are tender-crisp; this will ensure a crunchier end product.
- Ignoring Sterilization: Proper jar sterilization is imperative for preventing spoilage and ensuring long-lasting flavors.
- Neglecting to Adjust Spice Levels: Depending on your audience, customize spice levels to maintain balance without overwhelming flavors.
Storing Tips for the Recipe
Here are some essential tips to store your Extra Crisp Dilly Beans, ensuring they remain fresh and delicious:
- Keep the jars tightly sealed in the refrigerator for up to one month.
- For long-term storage, process the jars in a boiling water bath as mentioned earlier.
- Store jars in a cool, dark place if unopened; this will maximize the flavor preservation.
Conclusion – Extra Crisp Dilly Beans Recipe
In just four easy steps, you can create Extra Crisp Dilly Beans that are not only delectable but also customizable for any palate. Don’t miss out on trying this tasty recipe. We’d love to hear your feedback, so please leave a comment or share your experiences, and remember to subscribe for more culinary delights!
FAQs – Extra Crisp Dilly Beans Recipe
Can I use frozen green beans for this recipe?
Using fresh green beans is highly recommended for the best crispiness, but if you opt for frozen, ensure they are thawed and fully drained, as excess moisture can affect texture.
How can I make these dilly beans spicier?
You can easily amp up the heat by adding more red pepper flakes or incorporating sliced fresh jalapeños into your jars. Always adjust gradually to find your preferred level of spice.
Is it necessary to process the jars for storage?
Processing jars in a boiling water bath is only needed for long-term storage. If you plan on consuming them within a month, they can simply be stored in the refrigerator without processing.
What variations can I try with the spices?
Feel free to experiment with spices like bay leaves, thyme, or even a touch of smoked paprika for a unique flavor twist that complements the traditional dill taste.
How long do the dilly beans last?
When properly canned and sealed, dilly beans can last up to a year in a cool, dark location. Once opened, store them in the refrigerator and consume within a month.
Explore more delicious recipes in : Healthy Recipes
Follow us on Instagram for daily recipes & kitchen tips
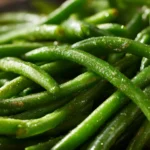
Extra Crisp Dilly Beans Tangy Crunchy Delicious Treats
- Total Time: 45 minutes
- Yield: 8 servings 1x
Description
Discover Extra Crisp Dilly Beanstangy crunchy snacks that make the perfect delicious treat Elevate your snacking game with every bite
Ingredients
Instructions
- Prep Time: 30 minutes
- Cook Time: 15 minutes
- Category: Side Dish
- Cuisine: American
Nutrition
- Calories: 30 calories
- Sugar: 1g
- Fat: 0g
- Carbohydrates: 5g
- Fiber: 2g
- Protein: 1g


